Monday, March 30, 2009

Excalibur 2900 9 Tray Dehydrator

Features of the Excalibur Model ED-2900 Dehydrator * Controlled environment for a wide variety of uses, i.e. making fruit roll-ups and trail mixes, drying flower arrangements and herbs, plus various uses for art and crafts, and photos * 9 Trays with 15 square feet of drying area * Includes 9 polyscreen tray liners * Includes 28-page dehydrating guide * 7" FAN/600 WATTS * 1-Year warranty


In the fall time the herb growing season starts to wind down, but this doesn't mean the end of your herbs usefulness in the kitchen. Drying herbs in the autumn is a great way to extend their usefulness. Imagine setting around the table with your family on a cold winter night, with the smell of your favorite herbs steaming out from your favorite dish that you so lovingly prepared. Not only that but dried herbs look very appealing hang in in your kitchen or the pantry.

A herb that contains high moisture can be a bit more difficult to dry. Herbs such as bay, dill, thyme, marjoram, summer savory, sage, basil and oregano are just a few that lend themselves to drying.

Herb plants that are going to be harvested should be harvested in the early morning, in this way they have not extended much energy. Also if you can gather them just before they go into bloom they will be in their best condition for you to produce great dried herbs.

Increased flavor is obtained from the herbs if the leaves are dried whole, but when used they should be crumbled first before being added to your favorite dish . Herbs can be kept for a year or two, but for better results and increased flavor is recommended that they be used within six to 12 months. Your dried herbs should be stored in a airtight container placed in a cool dark dry place.

Herb drying can be carried out in a few different ways. These are a drying rack, hanging in warm well ventilated shady spot, microwaving, dehydrator and not really drying but freezing the herb leaves will preserve herbs also.

4 common methods a drying herbs

#1: Air drying
For small batches of herbs one should make sure first that they are rinsed off and all the water padded off. Pick off any of the wilted leaves and just leave the healthy looking ones. Next tie a bundle of herbs tightly around stems and insert into a brown paper bag. Make sure that this bag is large enough as to leave lots of room around the leaves of the plants. It is best practice to hang the herbs upside down as this allows the essential oils to flow into the leaves and increases the flavor greatly. You should hang them in a dark warm area with the temperature somewhere around 70 to 80F.

#2: Microwave drying
For people that don't have the patience or just want to get to their herbs dried quickly, the microwave offers a great solution. The disadvantage is that you can only do small batches at the time. The high-frequency waves produced by the microwave will cook the herbs from the inside to the outside. The drying process usually only takes two or three minutes in the microwave on a high setting.

#3: Oven drying
Oven drying is not a recommended way of drying herbs, as it evaporates the water and essential oils in the herbs to quickly, but for those that can't wait it will suffice. Herb roots can be successfully dried in the oven. Thick walled herbs such as basil and rosemary do well. It should only take a couple hours in the oven to produce your dried herbs.
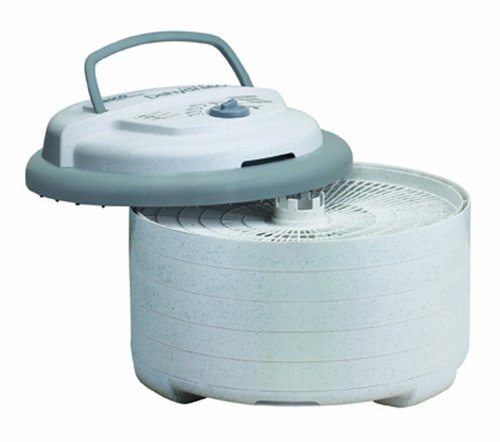
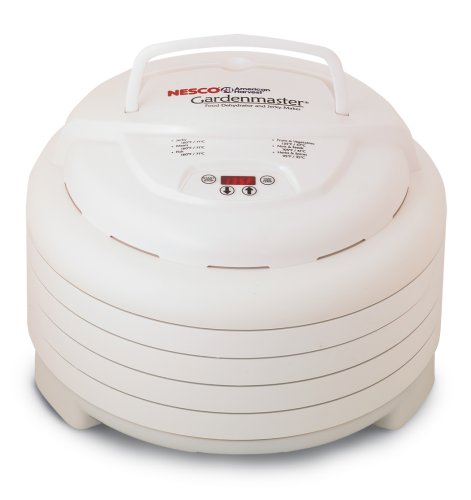
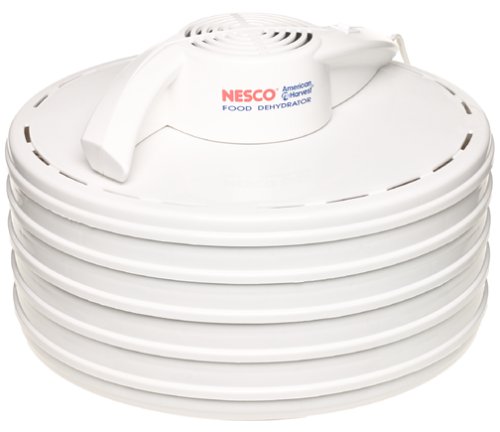
#4: Dehydrator
The main advantage of using a dehydrator is that you can control the temperature and air circulation. This tends to produce a high quality dried herb. Another advantage of using a dehydrator is that you can dry large quantities of herbs and also herbs with high moisture without any problems.

So if you're looking to prolong your bounty that you have grown in your summer herb garden be sure to try drying your herbs for winter use.

Herbs can give you a sexy strong healthy body, so if that,s what you are looking for check this out!

http://www.herbgarden.rolltra.com

dehydrator

Saturday, March 14, 2009

Nesco American Harvest FD-75PR 700-Watt Food Dehydrator

The NESCO Professional Food & Jerky Dehydrator has more power than most dehydrators -- 700 watts -- which means faster drying time. You will have results in hours, not days. The top mounted fan with patented Converga-Flow action pressurizes air downward through the outer ring and horizontally across each individual tray, converging at the center, for fast, even drying. No need to rotate trays. The adjustable thermostat allows you to dry different foods at proper temperatures (95-155 F), providing the flexibility to produce the best drying results. As your needs grow, the Professional Food & Jerky Dehydrator can be expanded up to 12 trays.


Part of my pantry is used for dry staples. Rice is one that I always keep on hand, and I mean real rice not that instant stuff. I doubt if that has any nutritive value. Wild rice and brown rice have a place on my shelf also. there are a lot of dishes to make with rice. The wild rice I use for hot dishes, soup, or as a side dish to compliment wild game. It takes a bit longer to cook, but well worth the effort.

One of my grandfather's favorite foods was rice pudding, made with white rice. I recall my grandmother making it quite often. Sometimes she would spice it up and other times leave it plain to top off with some kind of berry sauce. Of course she made it in the wood stove oven. I had not made it for quite awhile until someone brought me something they called rice pudding. Naturally thinking about how my grandmother made it, I complimented that person for being so thoughtful. That was before I tasted it.

I held my tongue and did not say a word. It turned out that person bought something at the grocery store labeled rice pudding. To my way of thinking it was nothing but pudding from a box with instant rice in it. It was horrible! The words instant, fast, quick and ready in 1-minute do not fit my vocabulary when it comes to food. So I proceeded the very next day to show what rice pudding is.

I put 1-quart of whole milk in a 2-quart baking dish. I added 1/2-cup of white rice and 1/2-cup of sugar and a dash of salt. Then I turned my oven to 300-degrees, put my baking dish in a pan and added 1-inch of water to the bottom of the pan. I let the rice cook for 1-hour, stirring every 15-minutes. Then I let it bake for another hour and a half undisturbed. Making rice pudding this way creates a smooth textured dish, not the lumpy, almost chewy stuff from the store. I made this for my children as one of the first solid foods they ate.

I invited my friend over for dessert that day. When I said it was rice pudding and not pudding with rice not a word more was spoken, except to ask for the recipe and a second helping.

You can find casserole dishes at www.pothaven.com.

dehydrator

Monday, March 9, 2009

Mary Bell's Complete Dehydrator Cookbook

A guide to food dehydrating shows readers how to make preservative-free dried apple rings, candied apricots, beef and fish jerkies, sun-dried tomatoes, corn chips, herb seasonings, dried fruit sugars, and more. 100,000 first printing. Tour.


It is great to have fresh herbs at your fingertips for kitchen and medical use. However it has been said, that all things must come to an end and this applies to the seasons, which means the end of your fresh herbs.

To be able to make the best of the herbs all year round, you will want to know how to preserve them so they can still be used during the colder months.

When to Harvest

The best time to harvest your herb plants is just before flowering, which will occur when the weather begins to cool. Harvesting in late summer will give you the best flavor.

You can also harvest during the growing season to create extra growth start your stock. Cut the stems in mid-morning after the morning dew has dried but before the afternoon sun has started to warm them.

Air Drying of Fresh Herbs

Air drying works best with fresh herbs that have lower moisture content like oregano, rosemary and dill. Herbs with higher moisture will dry better using a dehydrator.

To air dry fresh herb plants use the following steps:

1. Cut the stems and remove any unhealthy leaves.

2. Rinse stems with some cool water,

3. Pat dry completely. Important to ensure no mould occurs.

4. Bundle together in batches of four to six stems, and hold them together with a rubber band. Keep in mind that the stems will shrink as they dry so you will need to check them regularly.

5. Store bunches upside down into brown paper bags that have a number of holes punched in them.

6. Tie the bags closed and hang them up in a warm, well aired room

7. Check them every week or two.

8. Once your herbs are sufficiently dried, store in airtight containers.

Keep the containers away from direct sunlight and use within one year.

Using this process for preserving your herbs, you will be able to enjoy the savory aroma and flavor of home grown herbs year round. Your family will be amazed with how your will have fresh herb taste even in the middle of winter!

Would you like the easy steps on having your own Herb Garden? This is only one of many free articles like information on Fresh Herb Plants from http://www.MyIndoorHerbGarden.com.

dehydrator

Thursday, March 5, 2009

Nesco American Harvest FD-1020 Gardenmaster 1000-Watt Digital Food Dehydrator

Top mounted fan eliminates the worry of liquids dripping into the heater chamber. Expands to a giant 20 trays so you can dry large quantities all at once! 1000 watts of drying power means you can dry more, faster.

These Gardenmaster Accessories Included FREE!
  • No-Spill Fruit Roll Sheet. Perfect for drying semi-liquids: soups, sauces, fruit rolls. Has exclusive "no spill" lips.
  • Clean-A-Screen. Flexible screen, allows easy drying of small items such as herbs, spices, and potpourri.
  • Jerky Spice Packet and Cure - Make your own jerky at home!

    Features and Benefits
  • Digital Timer is Programable for up to 48 Hours of Drying Time
  • 1000 watts of drying power!
  • Patented Converga-Flow®.
  • Adjustable Temperature Control.
  • Includes 52-page recipe and instruction book, 1 solid sheet, 1 mesh sheet, and 1 packet jerky spice to make great tasting beef jerky or venison jerky.
  • 4.5" Fan, 2400-RPM Motor, Adjustable Thermostat, 1,000 Watts.
  • Dries in Hours, not days. Fruit rolls 3-6 hours, Beef Jerky 4 hours, Apples 4-6 hours, Bananas 5-8 hours, Pineapple 4-6 hours.
  • Opaque Vita-Save® Exterior (blocks harmful light).
  • Expandable to 20 trays. No Tray Rotation, 1 Sq. ft. Per Tray


    Drying and preserving your fresh garden herbs is a simple and inexpensive way of having herbs readily available for your needs through out the year. Drying herbs can be preformed by two methods. Air drying or with the assistance of a dehydrator. Both methods work well under two different circumstances.

    Air drying works best with herbs that don't have a high moisture content like, dill, oregano, rosemary and thyme. letting these types of herbs dry naturally with the air method helps to preserve the oils in the plant. Herbs like, basil, chives and mint have a higher moisture content and can be dried with the assistance of a dehydrator.

    When air drying herbs you want to do it in an area that is dry, warm, dark with low humidity and well ventilated. The ideal temperature for air drying is sixty eight degrees Fahrenheit. If you don't have a dark area available you can simply cover the herbs with brown paper bags and punch holes through the bags to allow for ventilation. Under the proper conditions it can take anywhere between one and three weeks for your herbs to dry.

    Harvesting of herbs needs to be done before the plants starts to flower. If you have been harvesting throughout the growing season there is no need to worry about the plant turning to seed. This happens at the end of there growing season. Late summer is a good time to start harvesting. You want to start before the cool weather starts.

    The best time of the day to harvest is in the mid-morning. This leaves time for the morning dew to dry from the plants.

    A environment friendly and healthy way of gardening. Organic Gardening is away of gardening in harmony with nature. Growing a healthy and productive crop in a way that is healthier for both you and the environment.

    John Yazo

    http://www.organicheirloomgardening.com

    dehydrator
  • Sunday, March 1, 2009

    Nesco American Harvest 5-Tray FD-35 425-Watt Snackmaster Dehydrator

    This unit features Nesco/American Harvest's innovative Top Mounted Powerhead that dries food quickly and evenly with superior results. Detaches to make dehydrator dishwasher safe for easy clean up. Fan-Flow Technology means faster, more even drying with no tray rotation necessary. Perfect for the beginner.


    Do cooking measurements matter? When a recipe calls for a pinch of this and a dash of that, does it really matter how much you put in? What will happen if you leave an ingredient out?

    If you're an inexperienced cook, you wonder about the answers to these and other questions. Let's take the mystery out of cooking measurements once and for all.

    What's a Pinch or a Dash?

    A pinch of an ingredient (usually a spice) is literally the amount of the ingredient that can be held between your thumb, your index finger, and your middle finger. A small pinch is the amount of an ingredient that can be held between your thumb and one finger (take your pick which one you want to use). A dash, on the other hand, is a measurable amount - less than one-eight of a teaspoon but more than one-sixteenth.

    Converting Cooking Measurements

    Follow this table to convert U.S. measurements to metric:

    1/5 teaspoon...1 ml

    1 teaspoon...5 ml

    1 tablespoon...15 ml

    1 fluid ounce...30 ml

    1/5 cup...50 ml

    1 cup...240 ml

    2 cups (1 pint)...470 ml

    4 cups (1 quart)...95 liter

    4 quarts (1 gal.)...3.8 liters

    1 oz. weight...28 grams

    1 pound...454 grams

    What If It Gets Left Out?

    Including all the minor ingredients is more important in baking things like cakes, cookies, and pastries, than it is in meat loaf, omelets, and salads. Generally speaking, it's a good idea to follow the recipe. Whoever wrote the recipe experimented with the cooking measurements to get them just right.

    Now, if you know you can't stand the taste of cumin, and you want to substitute oregano for cumin in a meat loaf recipe, that's one thing. But leaving ginger out of ginger spice cookies is just wrong.

    Measuring Tools

    The importance of cooking measurements has led to a whole industry of cooking measuring cups and spoons. One of the most popular cooking measuring cup sets today is a blue ceramic set that looks just like a big coffee cup, marketed by Nigella Lawson the beautiful and famous television chef.

    The most popular measuring spoons are heart-shaped measuring spoons by RSVP International. These spoons have arrow handles and heart-shaped measuring spoons. They make the user smile every time they use them.

    The final cooking measurement device every cook needs is a scale. The best scales are digital, with the ability to accurately weigh items in bowls or plates or on slips of waxed paper.

    Echo Wang is a contributing Editor for cooking-tips Find out which cooking products, treatments & solutions will continue to be beautiful at any time. Our site is dedicated to providing information about cooking well options so you can continue to do it perfect, if want to more information, please visit Cooking Measurements Inexperienced Cook

    dehydrator